October 21'st 2006.
I took some time lapse sequences of the process.
I've changed a few things in my set up.
Firstly -
I'm now using a hacked fridge compressor as my vacuum pump. It is
much quieter and probably better for my health because the proper
vacuum pump emits a mist of vacuum oil which is said the be very
bad for you. The fridge pump can not produce as hard a vacuum but
in practice it makes no difference.
Secondly - I usually use a
release film of sorts. I couldn't source anything suitable at my
fibre glass supplier. The only handy source of perforated film I
found is bread bags. I haven't been able to buy any so I'm using
recycled ones. When I've run out I've used plastic wrap and
pricked it by hand – I will be making a pin roller to make
this easier. I've also found cheap plastic suction cups make
excellent infusion and vacuum ports.
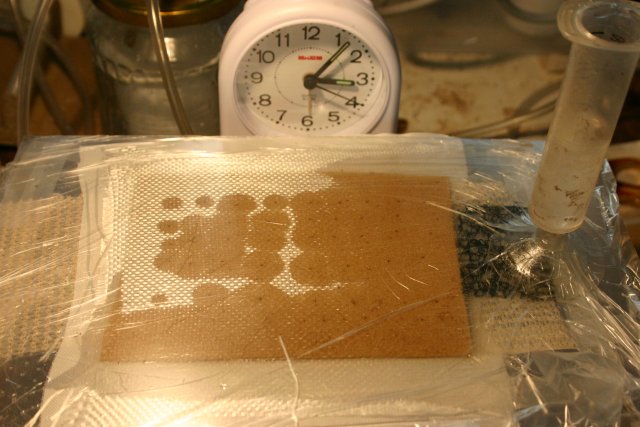
In the first clip the material being infused is glass cloth (I guess 150 GSM). This is covered with peel ply but no release film this time. There is no resin transport layer as such. The resin is distributed using shade cloth. At this scale the cloth is acting like the in bag resin lines used on large jobs.
I wanted to show how the resin flowing out of parallel strips of low resistance material (spiral lines or enka fusion would do the same) fill the regions in between and produce a “V” in the gaps and then wavy resin front. You can see this in the still image below.
The strip of shade cloth left of centre was to try to straighten the front. This seems to have worked but it is hard to be sure.
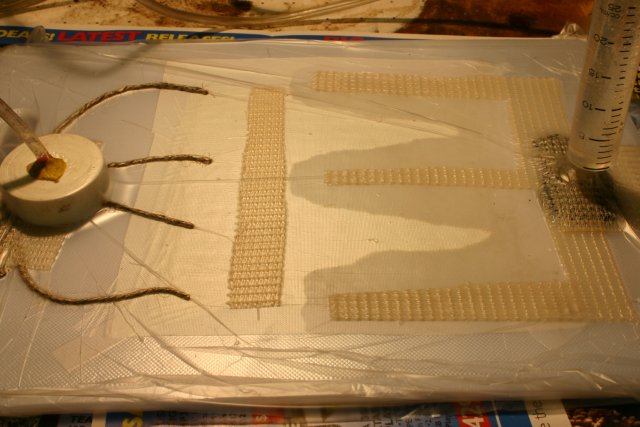
The four strings of the left were to test out my idea of having current limiters to control the resin flow at the vacuum port. The rough idea is that the strings can pass a large volume of gas but only a small amount of resin. The string limits the amount of resin being sucked out of the port in that region – there are lots of ways to do this and a compromise must be made between wasting resin and having enough flow to transport trapped bubbles away. It this demo the resin front was already quite straight when it arrived so there wasn't much to see.
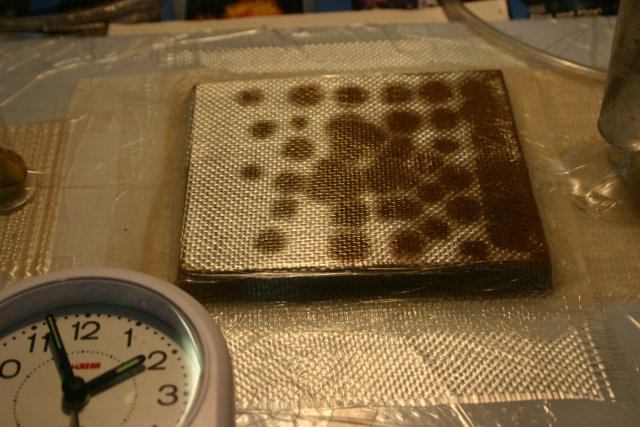
I wanted a method to make foam sandwich composites in a mould. This is kind of academic as I don't actually need to do this at the moment. I want it to be light so I can't incorporate a transport layer next to the mould as you could building a boat. I simply poked pin-holes into the foam hoping the resin would infuse from the “open” side into the fibre between the mould and the foam. I made quite a few including some “T” sections. About half my test had defects. In order to try to see what was going on I made this “up side down” sandwich. It is underside down in that the transport media is underneath and what you can see is similar to what normally happens next to the mould. This isn't perfect because the plastic bag conforms to the weave and inhibits resin flow more than a rigid surface would. The core is 12mm PVC with a single layer of glass on either side. Under the bottom layer of glass is peel ply, release film and a shade cloth resin transport layer.
This turned out to be the worst infusion I've ever done. Things look good for a little while then the infusion of the top side almost stops. If you watch the clip you will see that as soon as the resin reaches the left (vacuum) side of the piece things go bad. What happens is the resin surrounds the test piece and effective cuts off the vacuum from the top side.
To make the
next test a bit more realistic I set it up on a piece of clear
polycarbonate sheet.
I made a couple of changes at the vacuum
side.
The first was the make the shade cloth transport medium
shorter so it ended about 20 mm from the left side of the foam.
This reduces the amount of resin flowing from the underside (as
you see it). The second was to have shade cloth from the vacuum
port right up to the foam so excess resin could be removed and
good vacuum maintained at this edge.
The difference was outstanding. The whole thing infused in three minutes. The shade cloth on the left wasn't sitting properly and there is a slight gap at the corner (upper left). This infused more slowly than the rest. The holes in the foam where deliberately unevenly spaced to see how critical the placement is. A dry spot was formed but pretty much disappeared later. The end product look pretty good, there were some small voids in the gaps in the weave where the dry spot had been but I doubt this would noticeably weaken the laminate.